Switch from iTerm2 to Ghostty on MacOS
The dropdown terminal is a crown jewel of iTerm2 and it has changed the way I interact with my Mac. It’s even mentioned in my Mac productivity tools blogpost from 3 years ago! Safe to say - I don’t think I can ever let go.
Now Ghostty is a new terminal by Mitchell Hashimoto. I really like his posts on twitter, so I thought I’d give Ghostty a shot. So here’s how I recreated my iTerm2 setup.
Shift+Esc Shortcut
Here are the quick terminal docs, just in case.
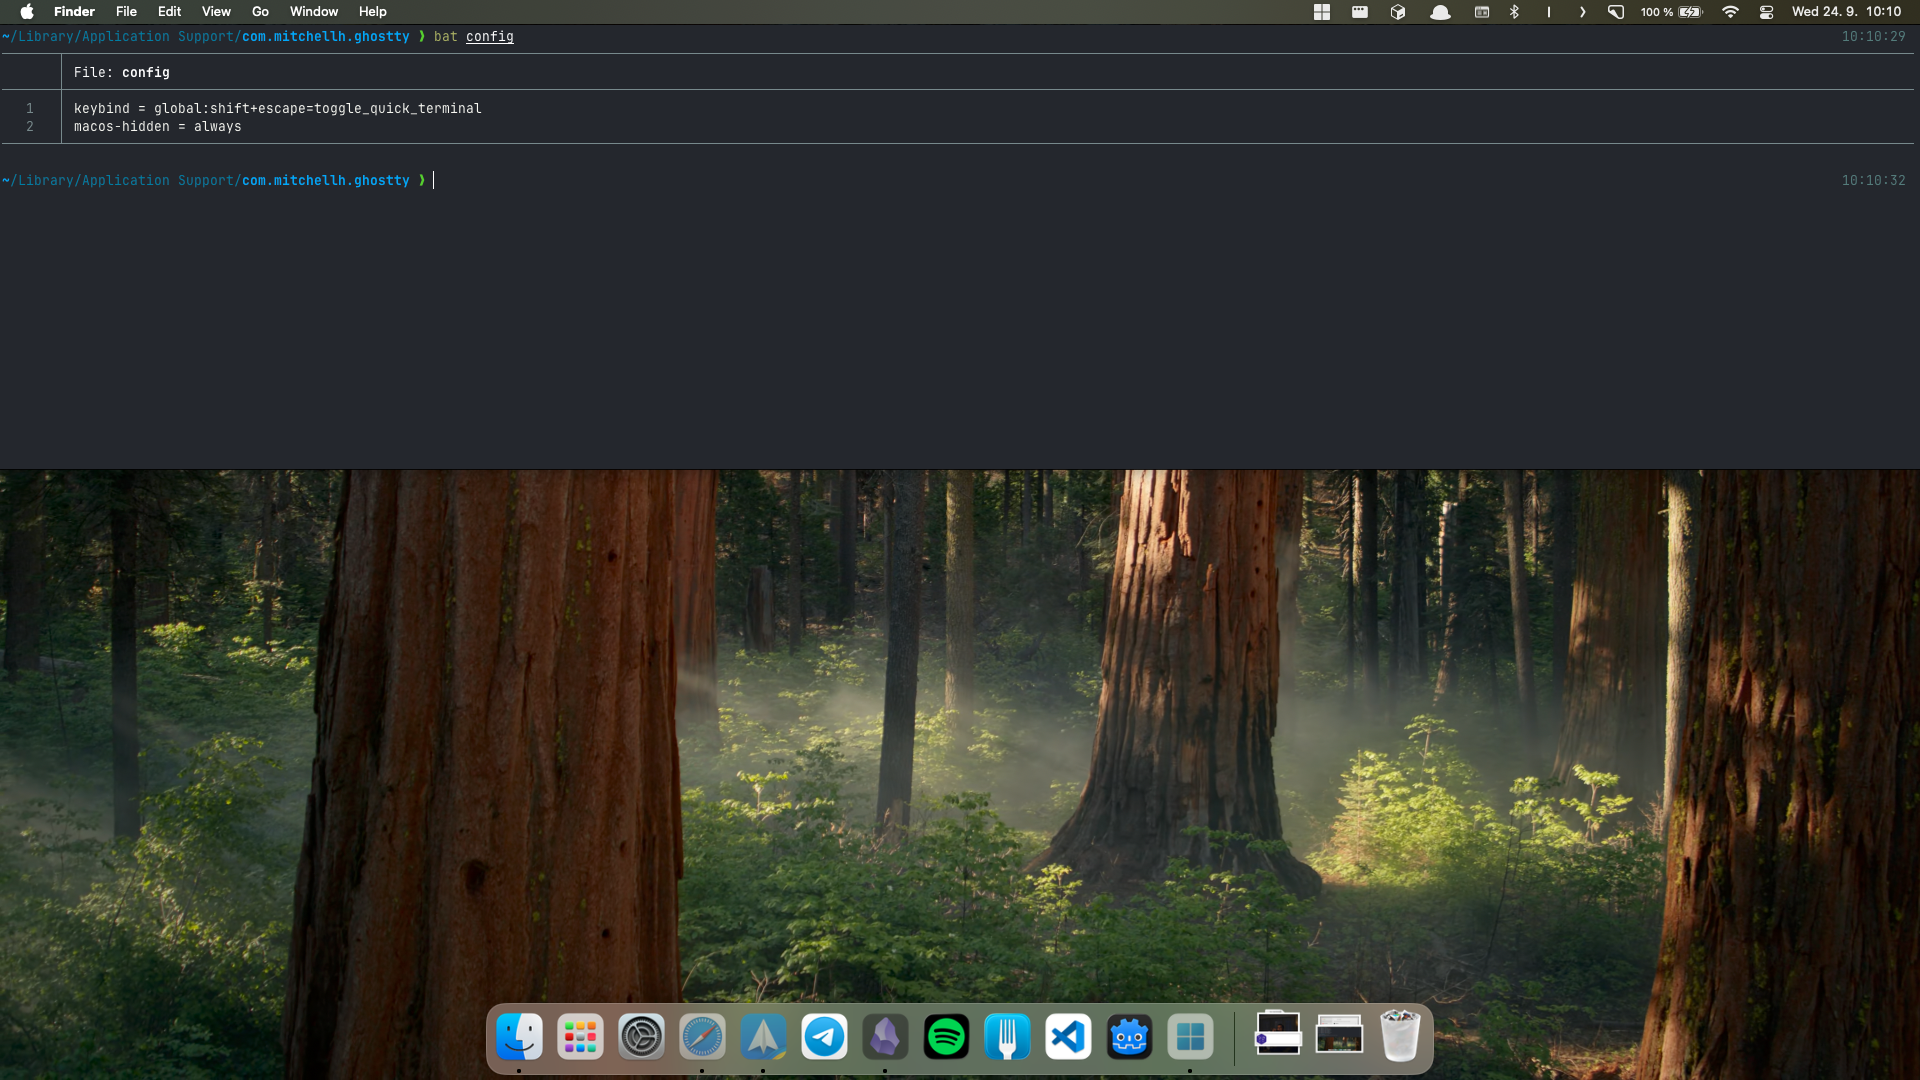
Paste this into $HOME/Library/Application\ Support/com.mitchellh.ghostty/config. OR press Cmd + , (to open Ghostty preferences) and the file opens in TextEdit
keybind = global:shift+escape=toggle_quick_terminal
macos-hidden = always- I’m used to hitting Shift + Esc to call down my terminal.
- I like how iTerm2 stays hidden and out of the way. It’s always running and I don’t need it to take up space on my Dock. The
macos-hiddenoption hides the only ghostty window is the dropdown one.
Always running
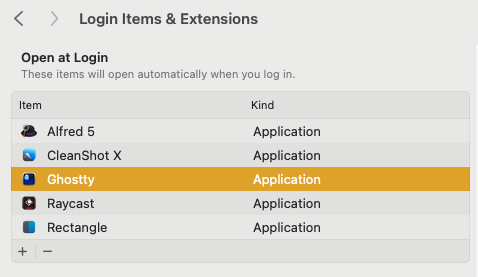
Terminal is essential to me and I want it to be always running when I turn on my Mac. Adding Ghostty to Login Items does the trick. I also removed iTerm from there, since the shortcut would collide with Ghostty.
Always at hand
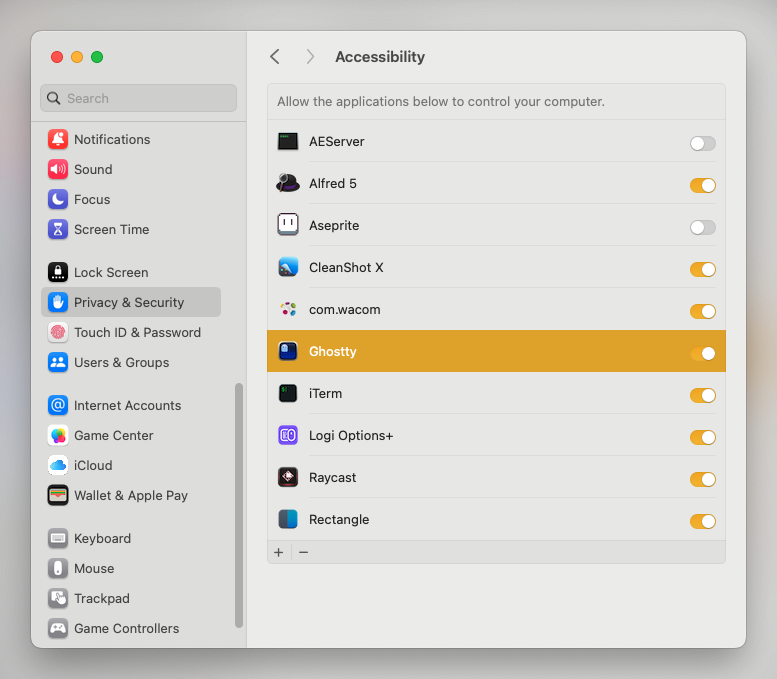
The global: keybind specifier tells Ghostty, that this shortcut should be available even when Ghostty is not in focus. To make it work, you have to enable Ghostty in settings:
Done!
The main advantage of Ghostty is that it only consumes about ~100MB or memory (for me) compared to the ~220MB that was taken by iTerm. Since I was a cheap ass when buying my laptop and I only got a macbook with 8GB of RAM, I need all the memory I can get! 😄